Professional Kitchen Tile Installation in Oxford, MS
Porcelain floors, custom backsplashes, and precision grout work — built to handle the demands of North Mississippi kitchens for decades.
Kitchen Tile That Performs Under Pressure
The kitchen is the hardest-working floor in any home — constant foot traffic, spills, dropped cookware, and moisture from the dishwasher and sink put tile under daily stress. A job done right starts beneath the surface: proper subfloor preparation, the correct thin-set for the tile format, and grout that holds up in a wet, high-traffic environment. TAV Construction treats every kitchen tile project as an infrastructure job first and an aesthetic one second.
We serve Oxford, Lafayette County, Tupelo, Corinth, New Albany, and surrounding communities across North Mississippi. Whether you're replacing worn ceramic, upgrading to large-format porcelain, or adding a custom backsplash, our crew handles every phase — demo, subfloor leveling, tile setting, grouting, sealing, and transitions.
What We Handle
- Porcelain and ceramic kitchen floor installation
- Large-format tile (12×24, 18×36, 24×48) with leveling systems
- Cement board and moisture-resistant underlayment
- Custom kitchen backsplash — subway, mosaic, designer formats
- Grout selection and stain-resistant grout application
- Seamless transitions to hardwood, LVP, and carpet
- Tile repairs, re-grouting, and hollow-tile replacement
- Layout planning for symmetrical patterns and minimal waste
- Cutting and fitting around islands, cabinetry, and appliances
Custom Kitchen Tile Solutions for North Mississippi Homes
Cookie-cutter tile work doesn't hold up in a working kitchen. Every installation decision — from substrate to grout line width — is made with your specific floor, traffic level, and finish goals in mind.
Porcelain & Ceramic Flooring for High-Traffic Kitchens
Not all tile is equal. For kitchen floors, we guide clients toward porcelain with a PEI hardness rating of 4 or 5 — dense enough to resist chipping from dropped pots and scratching from everyday foot traffic. The through-body color of quality porcelain means wear marks stay invisible even after years of use. Glazed ceramic remains a solid, cost-effective option for lighter-use kitchens, but we always confirm the product's slip coefficient (DCOF) before recommending it for wet zones near the sink or dishwasher. The right tile for your kitchen depends on how you use it — we help you make that call with actual technical data, not just aesthetics.
Substrate Preparation: Cement Board & Moisture Underlayment
The number one cause of premature kitchen tile failure is a bad substrate. Tile needs a rigid, flat surface — any flex in the subfloor transfers directly to grout lines and eventually pops tiles loose. We use high-density cement board fastened into floor joists at 6-inch intervals, with fiberglass mesh tape and thin-set at all seams. In areas with moisture exposure or crawl-space conditions common in North Mississippi homes, we add a moisture-resistant membrane between the subfloor and the cement board to protect the wood structure below. This prep adds time to the project, but it's what makes the tile last.
Stain-Resistant Grout Application
Kitchen grout takes a beating — cooking oils, acidic spills, and foot traffic darken standard grout within months without diligent sealing. We use premium polymer-modified sanded grout in high-wear zones, and for clients who want maintenance-free performance, we offer epoxy grout that is chemically resistant and requires no annual sealing. Grout color is chosen during the estimate to complement your tile — light grout makes a small kitchen feel larger, while dark grout hides staining in busy households. Whatever the choice, we pack joints fully and tool them uniformly so the finished surface is consistent and easy to clean.
Seamless Transitions to Hardwood & LVP
Open-plan homes in Oxford frequently pair kitchen tile with hardwood or luxury vinyl plank (LVP) in adjacent living and dining areas. Getting this transition right requires planning: we confirm finished heights during layout so the tile and the adjoining flooring end up flush or within 1/4 inch — the threshold for a comfortable, code-compliant transition strip. We use Schluter T-profile or reducer strips mechanically fastened to the subfloor, not just pressed into adhesive, so they stay locked down through seasonal wood movement and heavy use. For traditional homes, a hardwood saddle threshold is also an option where the height allows.
Our Kitchen Tiling Process
Every kitchen tile project follows a structured sequence. Each phase has to be correct before the next begins — shortcuts at any step show up in the finished floor years later.
Site Inspection & Subfloor Assessment
We evaluate the existing subfloor for levelness, rigidity, and moisture. Any soft spots, squeaking boards, or high/low areas are documented and corrected before anything is installed on top. A floor that moves will eventually break tile — we eliminate movement at the source.
Layout Planning & Pattern Design
We dry-lay the tile from the room's visual center outward, adjusting the starting point to ensure cut tiles at walls are symmetrical and no less than half a tile wide. For diagonal or herringbone patterns, layout planning is critical to avoid awkward slivers in high-visibility areas.
Professional Cutting & Fitting
We use wet-saw and angle grinder cuts to fit tile precisely around kitchen islands, cabinet toe-kicks, dishwasher openings, and appliance alcoves. Plumbing stub-outs and floor registers get clean circular or rectangular cutouts — no broken tile edges left visible at the finished perimeter.
Grout, Seal & Cleanup
After thin-set cure, all joints are packed with the specified grout, tooled, and cleaned before the grout sets hard. A penetrating sealer is applied to non-epoxy grout to lock out staining. We leave the kitchen cleaner than we found it — no grout haze on tile faces, no thinset residue on cabinets.
Choosing a Kitchen Tile Format: Quick Reference
Standard Format (12×12 to 16×16)
- ✓ Forgiving substrate tolerance
- ✓ Works in any layout direction
- ✓ Fastest installation, lowest labor cost
- ✓ Versatile — traditional to transitional
- ✓ Easy to source for future repairs
Large Format (18×36 to 24×48)
- ✓ Fewer grout lines — easier maintenance
- ✓ Modern, open aesthetic
- ✓ Requires flatter subfloor (≤3/16″ in 10 ft)
- ✓ Back-buttering and leveling clips required
- ✓ Higher material and labor cost
Mosaic & Patterned (under 4×4)
- ✓ Best for backsplashes and accent areas
- ✓ High grout line density — seal regularly
- ✓ Geometric and encaustic looks
- ✓ Can follow slight surface variations
- ✓ Sheet-mounted for faster installation
Kitchen Tile Projects in North Mississippi
A sample of our recent kitchen floor and backsplash installations across Oxford, Tupelo, and the surrounding area.
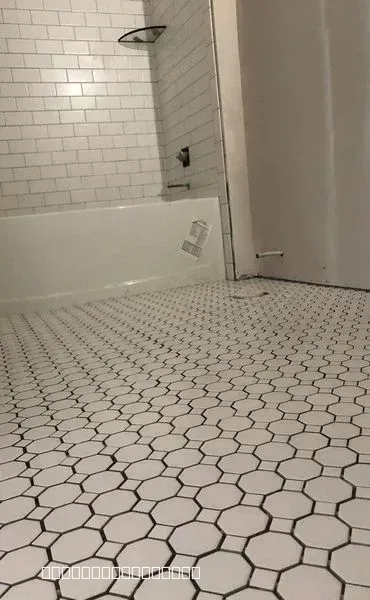
New Bathroom Tile Installation and Remodel
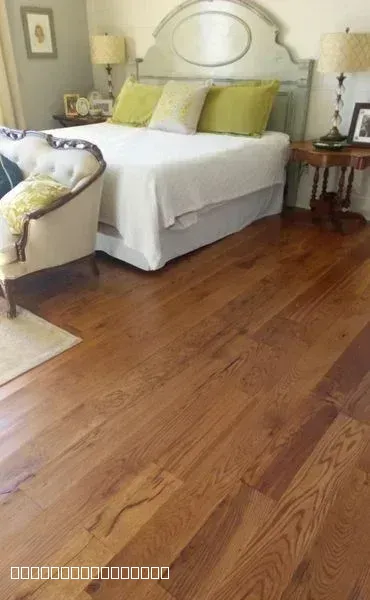
Beautiful Hardwood Flooring Installation in Bedroom
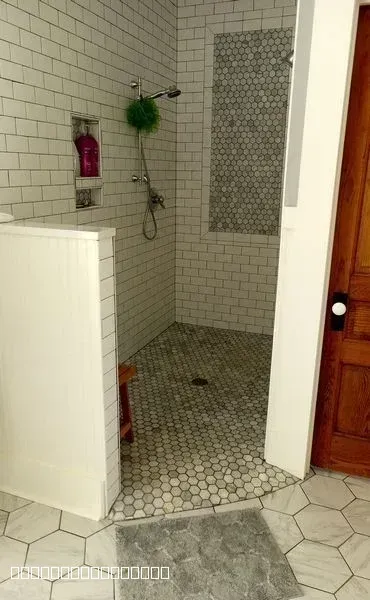
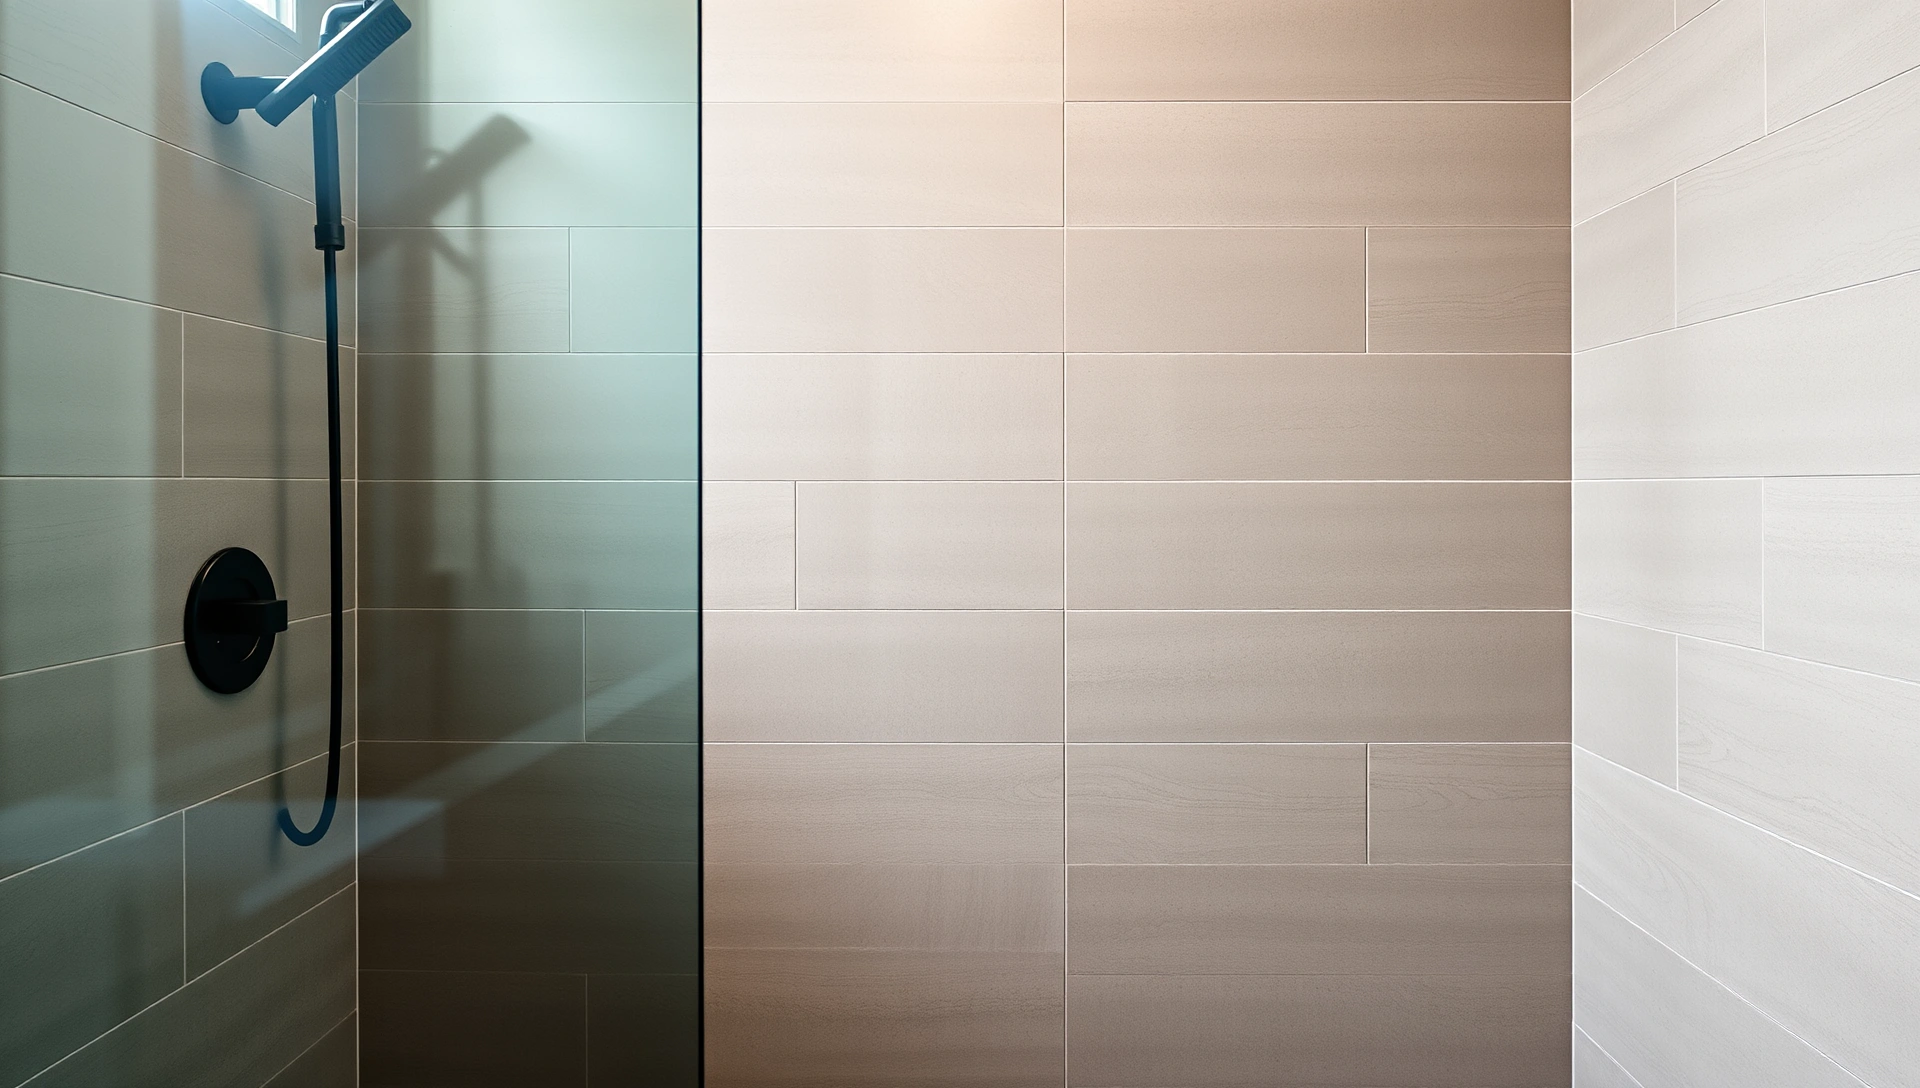
Modern Walk-In Shower With Subway Tile
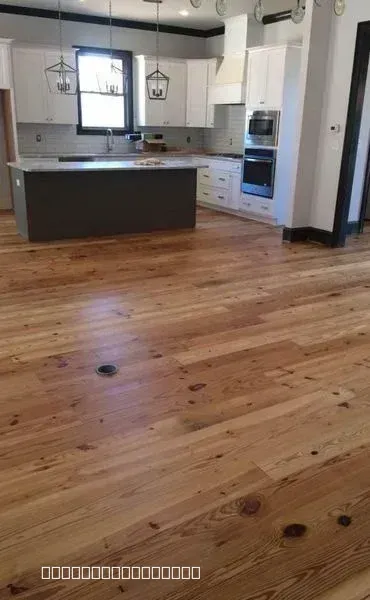
Modern Kitchen with New Hardwood Flooring
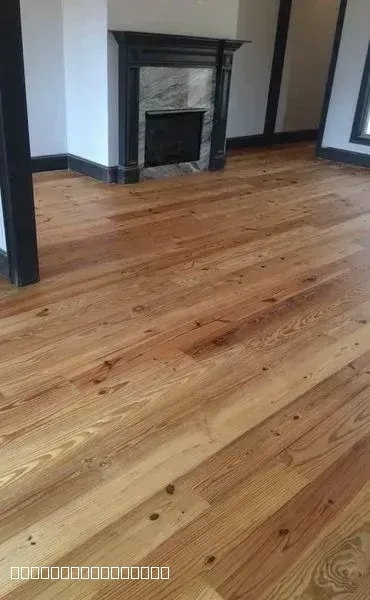
Beautiful Hardwood Flooring Installation with Fireplace
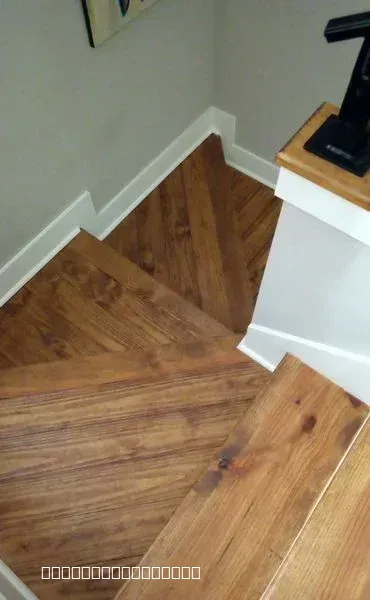
Custom Hardwood Staircase Flooring Installation Project
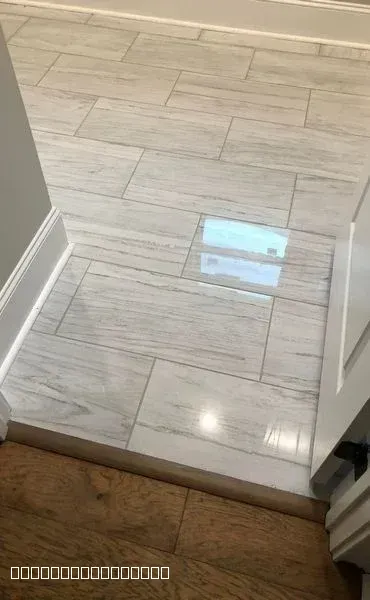
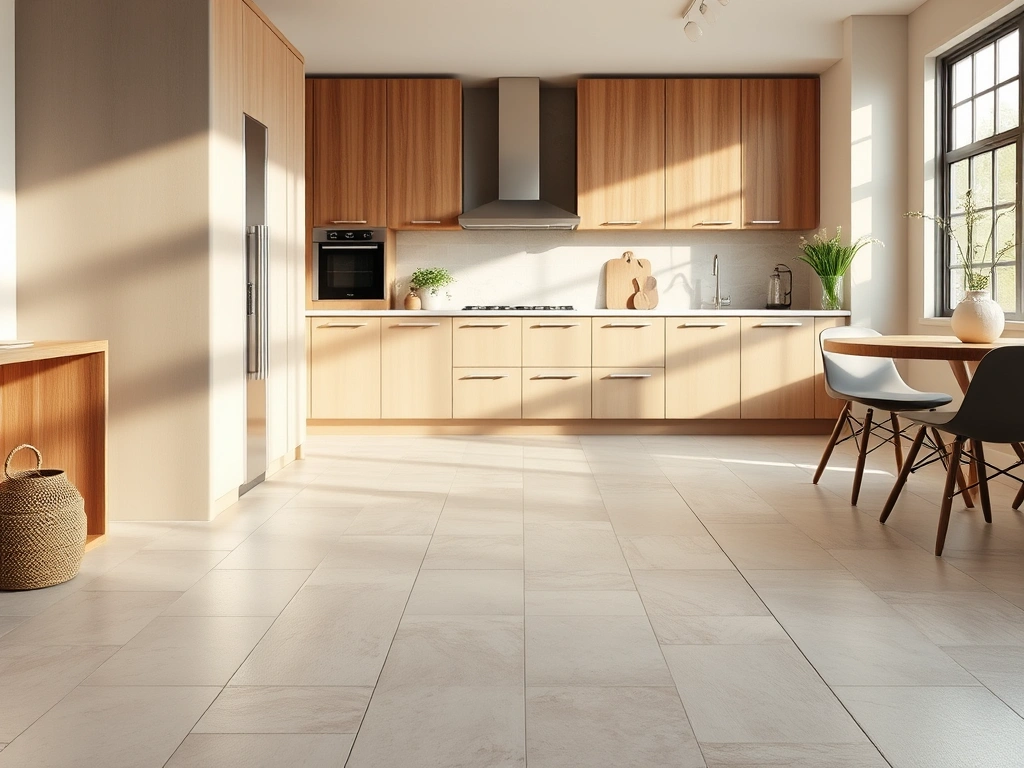
Professional Tile Installation in Modern Home
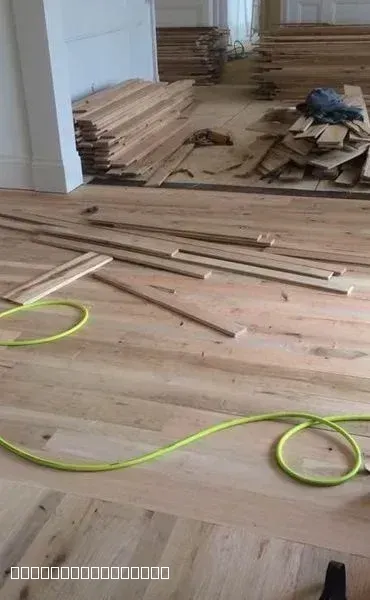
Hardwood Flooring Installation in Progress by TAV Construction
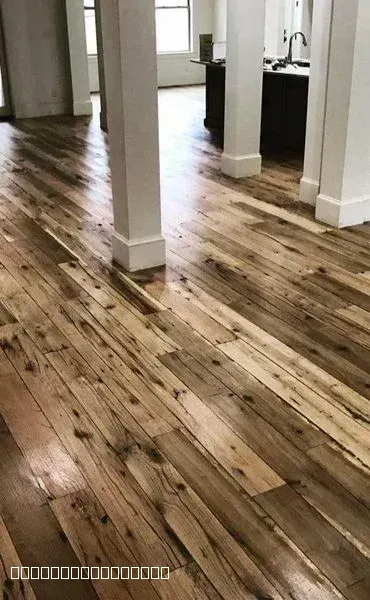
Rustic Hardwood Flooring Installation in Modern Home
Ready to Upgrade Your Kitchen Floor?
Get a detailed estimate from TAV Construction. We serve Oxford, Tupelo, Corinth, New Albany, and all of North Mississippi.
Related Tile & Construction Services
Custom Tile Backsplashes
Subway, mosaic, and designer-format backsplashes installed with the same precision layout and grout technique we apply to kitchen floors. Coordinated tile packages available.
Learn More →Shower Tile Installation
Schluter-certified waterproofing, custom niches, mosaic floors, and large-format wall tile for bath remodels across North Mississippi.
Learn More →Drywall Repair & Patching
Kitchen remodels often reveal damaged walls or soffits. Our drywall crew repairs openings and surfaces so your tile substrate is solid before work begins.
Learn More →What Our Clients Say
Real feedback from homeowners across North Mississippi who trusted TAV Construction with their kitchen tile projects.
"Tav Construction exceeded our expectations on installing a runner for our staircase in our guest cottage. We look forward to using them again on future projects in our home in Plein Air"
Steve Corso
2026-05-12
"My experience with TAV Construction was great. Gavin the brick layer does excellent work. He's good at what he does. I would recommend him to anyone who's looking for someone who's dedicated to doing his job. My hat goes off to him..."
Reginald Nicholson
2026-04-17
"Excellent flooring work and very dependable."
Scott Hayes
2026-04-17
"Glevin is a kind and generous human being - and from there, his talent flows. I've worked with him multiple times, hiring him to install tile, flooring - anything where finish counts. He is dependable, reasonable, thoughtful and considerate. A true professional."
Matthew Hackworth
2026-03-12
""
Reuben Jaime
2025-12-05
""
Sultan Fadel (Alsultanko)
2025-12-04
Serving Oxford, MS & Surrounding Communities
Conveniently located for Oxford and North Mississippi customers
Hours
Monday - Friday: 9am - 6pm
Saturday: 9am - 5pm
Sunday: Closed
Kitchen Tile Installation — Common Questions
Everything you need to know before starting your kitchen tile project in Oxford, MS.
1What is the average cost of kitchen tile installation in Oxford?
Kitchen tile installation in Oxford, MS typically runs $8–$20 per square foot installed, depending on tile format, substrate condition, and layout complexity. Material costs range from $2 for basic ceramic to $15+ per square foot for large-format porcelain or designer stone-look tiles. A standard 150 sq ft kitchen floor falls in the $1,200–$3,000 range. Backsplash work is priced separately by the linear or square foot. We provide detailed, itemized estimates before any work begins so there are no surprises at invoicing.
2How long does a typical kitchen tile project take?
Most kitchen floor tile projects run 3–5 days from start to finish. Day one covers demo and subfloor prep. Days two and three are for tile setting and initial cure. Day four handles grouting. Day five covers sealing and final cleanup. Larger kitchens, intricate patterns, or floors requiring extensive leveling add time. Backsplash projects are typically 1–2 days and can often run concurrently with floor work if separate crews are available. We confirm a realistic timeline during the estimate visit.
3What is the best tile for a high-traffic kitchen floor?
Porcelain is the gold standard for kitchen floors. It has a water absorption rate below 0.5%, making it highly resistant to spills and staining, and its through-body color means chips and scratches are far less visible than with glazed ceramic. For a busy household, choose a PEI rating of 4 or 5 — that's the industry measure of surface hardness for foot traffic. Slip-resistant textured finishes (look for a DCOF rating above 0.42) are important anywhere water gets tracked in from the sink or dishwasher. Glazed ceramic is a cost-effective option for lighter-use kitchens and cleans easily, but it won't hold up as long under heavy loads.
4Do I need to remove my kitchen cabinets before tiling?
For most remodels, no. Standard practice is to tile up to the toe-kicks of existing cabinetry, which requires precise cuts but avoids the cost and disruption of a full cabinet pull. If you're planning a new cabinet layout or doing a full gut renovation, we recommend tiling the entire floor first — it's easier to cut around new cabinet footprints, and the tile acts as a vapor barrier for the cabinet base in humid climates like Mississippi. We'll assess your specific situation during the estimate and recommend the right approach for your project scope.
5Is tile installation near me available for small repairs?
Yes. TAV Construction handles both full kitchen installations and targeted repairs — replacing cracked tiles, re-grouting high-wear sections, or fixing hollow (de-bonded) tiles before they break. We serve Oxford, Lafayette County, and surrounding communities across North Mississippi. Repair work is priced by scope, not by a flat service-call minimum. If you're dealing with a single broken tile or a grout failure in one section of your kitchen, reach out and we'll assess whether it's a straightforward swap or a sign of a deeper substrate issue that needs addressing.
6Can you install tile over an existing vinyl floor?
Technically possible in limited cases, but we rarely recommend it. For tile to bond permanently, the substrate must be rigid — vinyl flexes underfoot, and that movement will crack grout lines and eventually pop tiles loose. Single-layer vinyl on a solid subfloor is the best-case scenario; multi-layer vinyl, cushion-back vinyl, or any flooring over a crawl space is a recipe for early failure. Removing the vinyl adds cost upfront, but it lets us inspect and repair the subfloor, apply the correct backer, and give the tile a foundation it can actually bond to. The long-term result is worth it.
7How do you handle transitions to other rooms?
We use Schluter metal transition strips (T-profiles or reducer profiles) for a clean, modern edge where tile meets hardwood, LVP, or carpet. For more traditional homes, wood saddle thresholds are an option where the height difference allows. The specific profile depends on the height differential between the two floor surfaces — we select the right product during layout planning so the finished transition is flush, durable, and doesn't create a trip hazard. All transitions are mortared or mechanically fastened to the subfloor, not just adhesive-applied, for long-term stability.
8How soon can I walk on my new kitchen floor?
Plan for 24 hours before light foot traffic — just enough for thin-set mortar to achieve initial cure. Avoid dragging chairs or sliding anything across the floor for the full 48 hours. Once grout is applied (typically on day 4 of a standard project), give it another 24–48 hours before resuming normal kitchen use. Full appliance placement — refrigerator, dishwasher, range — should wait 72 hours after grouting. If a penetrating sealer is applied to the grout, add another 24-hour drying window before heavy use. Rushing this timeline risks cracking grout joints that are still setting.
Still have questions?
We're here to help you find the answers.
Expert Kitchen Tile Installation in North Mississippi
From subfloor prep to final grout seal — TAV Construction handles every detail. Call us or fill out our contact form to get your free estimate.